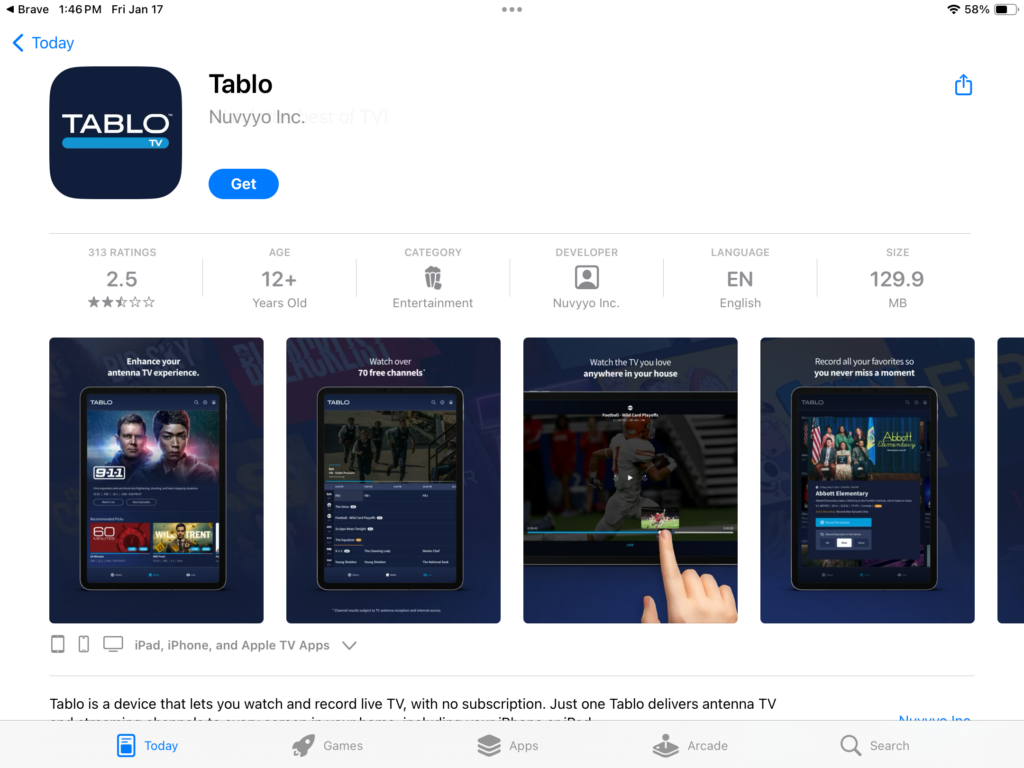
How to install Tablo DVR?
admin / March 20, 2026
This installation guide fourth (4th) generation two tuner Tablo DVR. This should take you about 15 minutes in total time.
What you will need in order to make your installation successful?
- Access to your email address you’ll be required to register and you’ll be required to verify your email address as you will receive a email verification containing a code.
- Access to high-speed Internet and with in range if you should choose to do this over a Wi-Fi network and you will need your wi-Fi network password. (You connect cable is supplied)
- Access to a power outlet. (Power cord is supplied.)
- You will need an antenna. (If you did not purchase the Tablo that comes with an antenna, any antenna that you have will work.)
- You’ll need a smart phone or a tablet such as an iPad to download the tablet app as this will make the installation a lot easier as opposed to doing this through your TV’s app.
It is strongly recommended that you complete the installation in one session however there will be a time that will allow you to pause and you will be able to resume where you left off should you need to resume at a later time.
Let’s start the installation!
To start the installation, download the Tablo app from the Android or Apple Store, depending on the device you are used. For this installation guide I will be using my iPad as I find this to be the easiest since everything is a bit bigger and not having to use a remote control to select each letter plus when it comes time to activating my Tablo account, I can easily switch over to my email and get the activation code.
Download the Tablo app from the Apple App Store (of course if you’re using an Android device from the Google play store or what ever App Store your device uses to download and install apps), depending on your device, your internet connection download times, including installation of the app app may vary, it is usually rather quick to download and install.
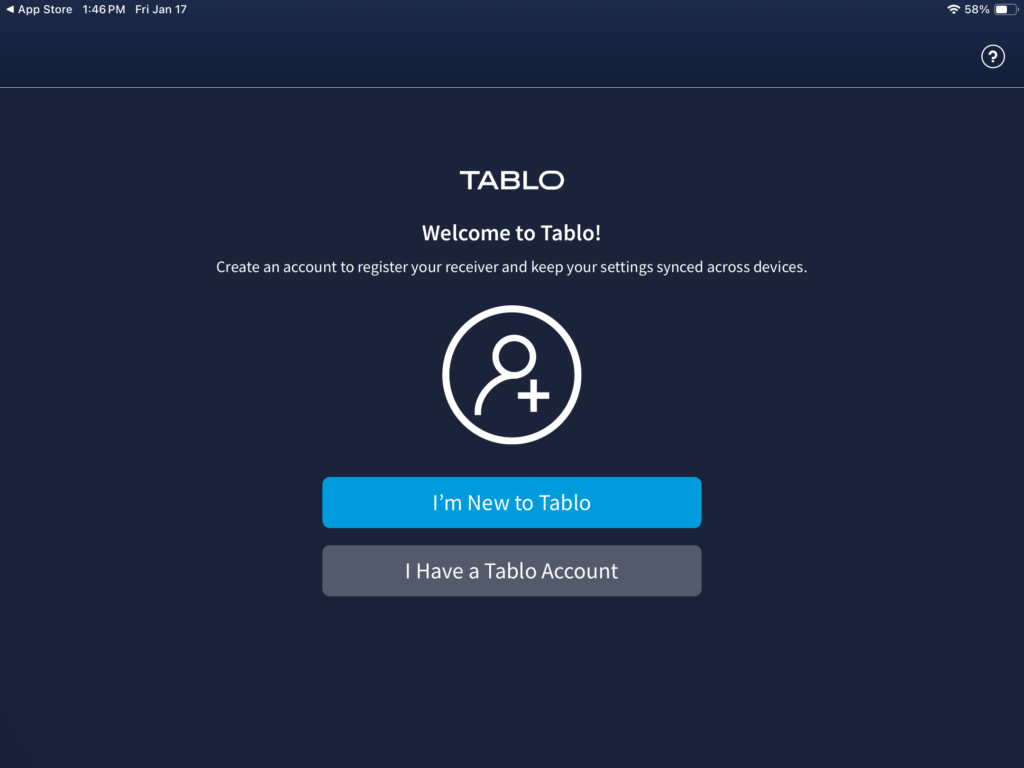
once you have installed the app on your device, open the app app annual will see two options, one is “I am new to Tablo” and the other is “I have a Tablo account”. if you are new to Tablo and you do not have a Tablo account tap on “I am new to Tablo”, then continue to the next screen.
All of the fields are required, you must enter your first, last name, valid email address, password and confirm the password. You will be required to agree to the terms of service and privacy policy. After this tap on “register”, and then continue to the next screen.

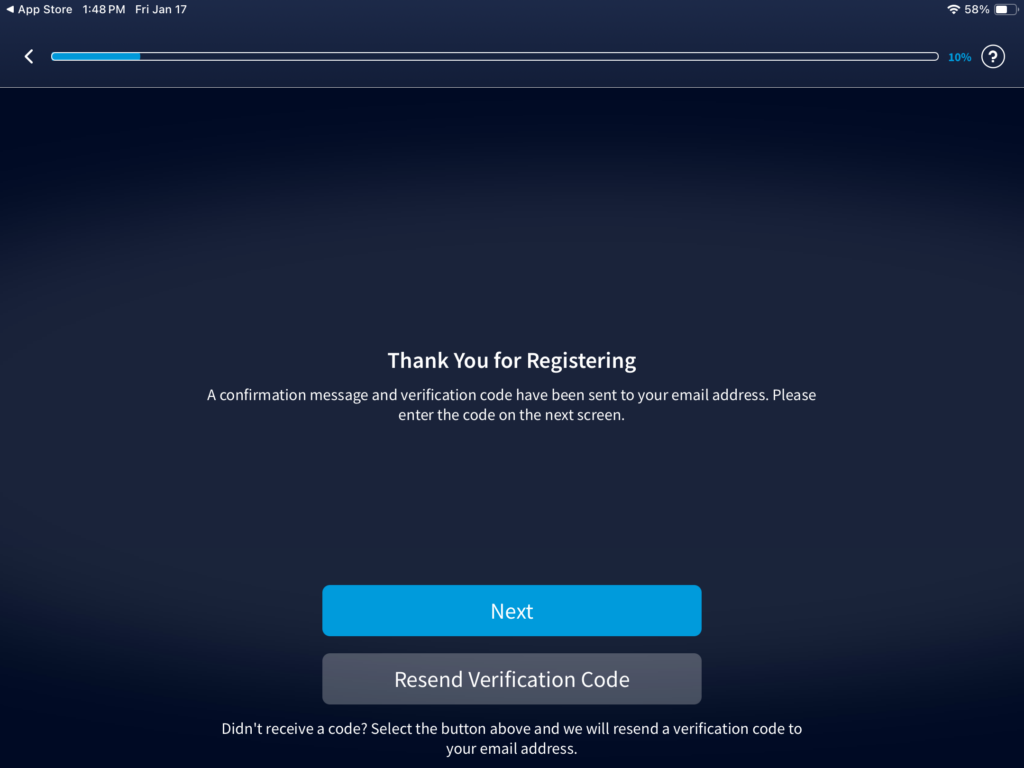
Log onto your email and check to see if you received an email from Tablo, you may need to check in your spam folder. The email will contain a verification code, if you did not receive the verification code tap on “resend verification code”, if you received your verification code then DO NOT tap on resend verification code instead tap on “next” and continue to the next step.
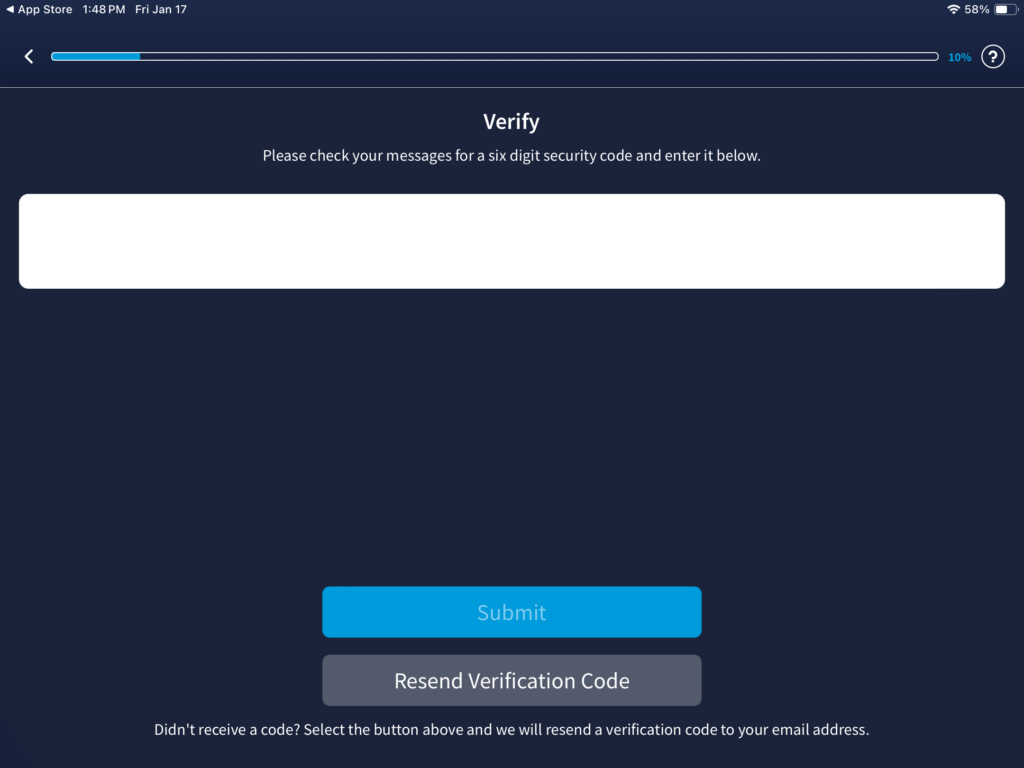
Your verification code or they call your security code is to verify that your email address is valid and to make sure that you are a human. if you received the six digit security code entered into the big box then tap on next and then continue to the next step.
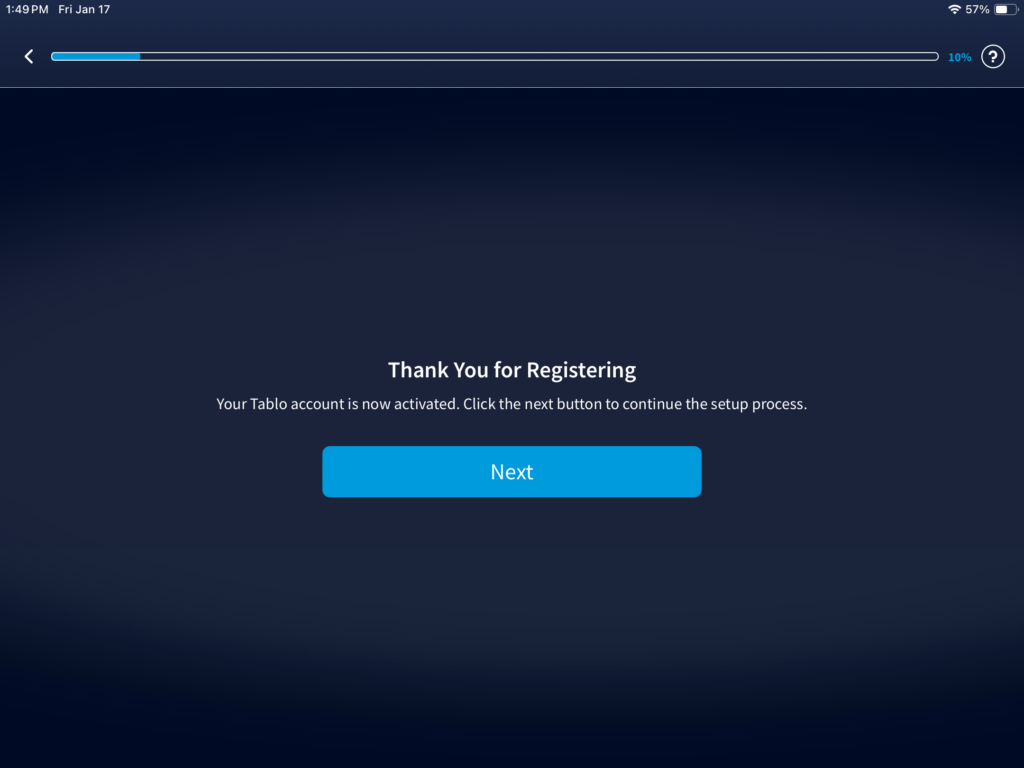
You have successfully registered and verified your email address. The Tablo account is now activated. Tap on next to continue with the installation.
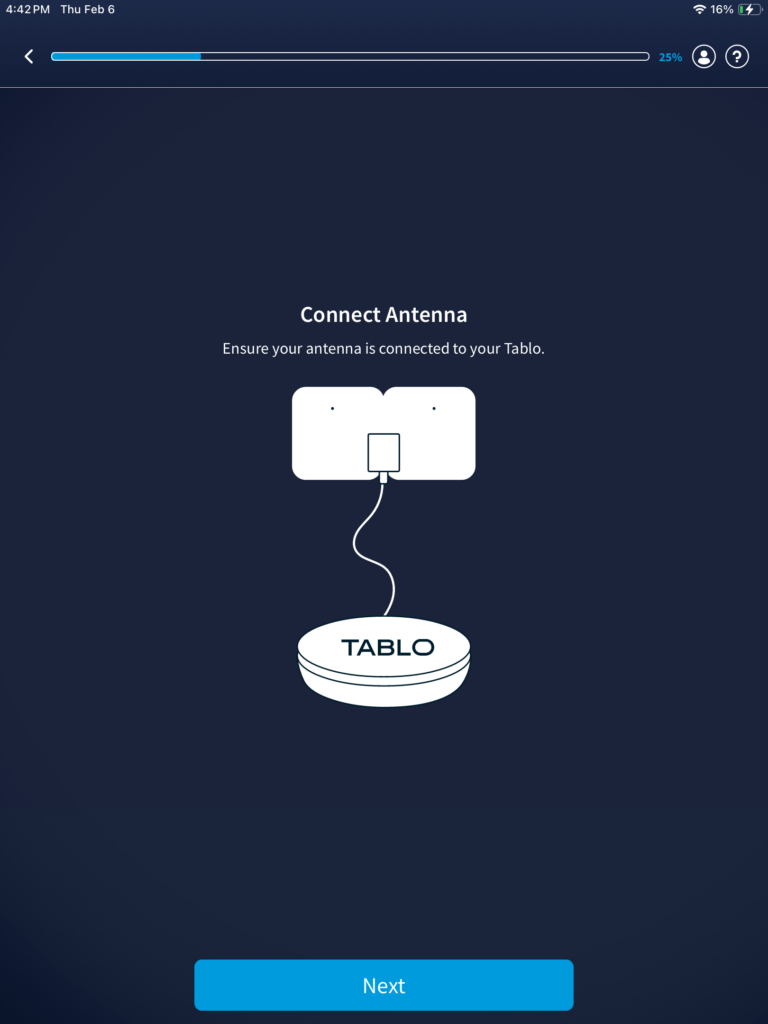
If you have not already connected your antenna to the Tablo connect your antenna to the Tablo. Tap on “Yes, set up my antenna” and then continue to the next step.

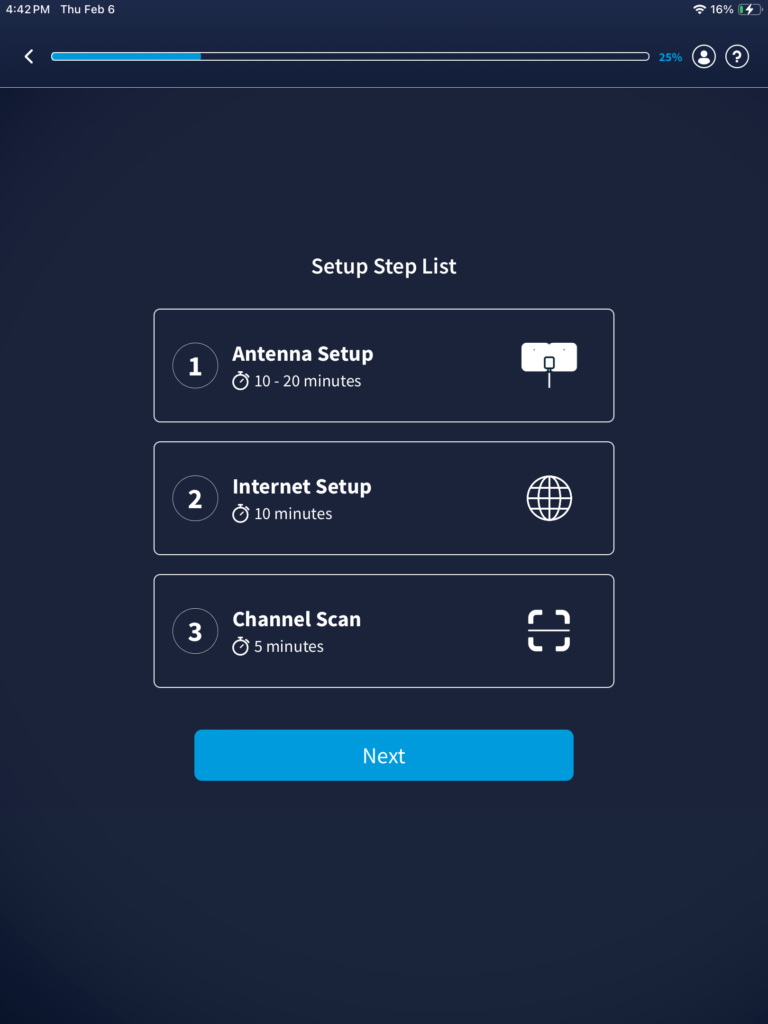
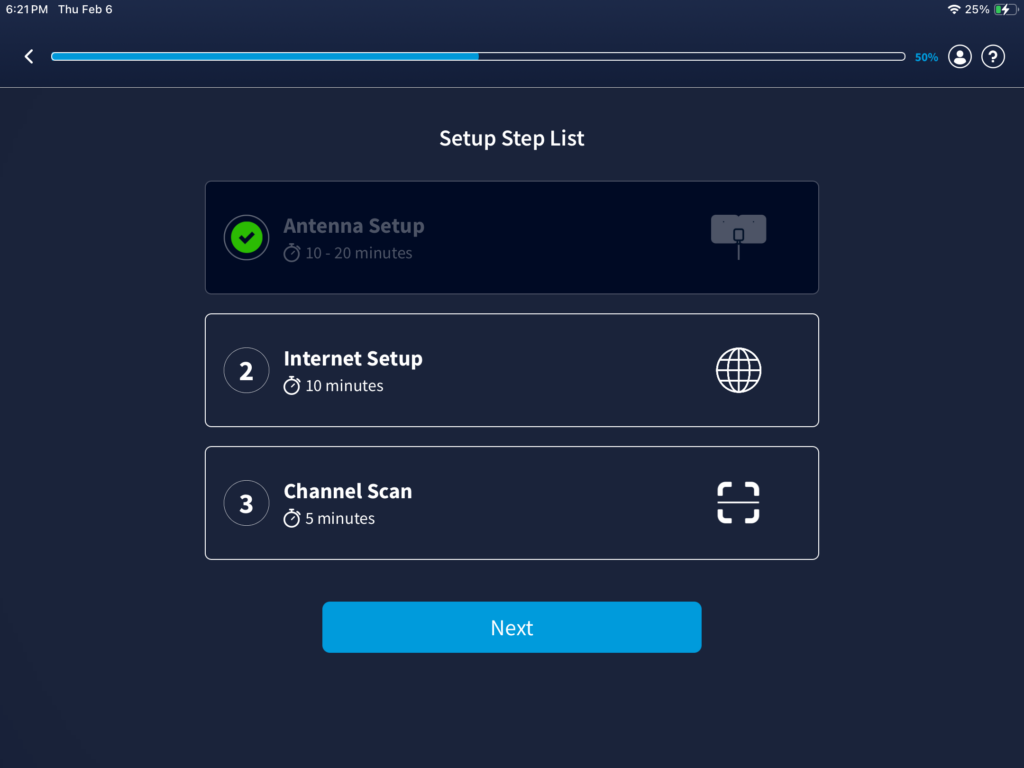
This is the set up checklist, the first thing is to complete the antenna set up, they are estimating that it can take from 10 to 20 minutes, Internet set up they are estimating it can take about 10 minutes, and the channel scan which they are estimating it will take about five minutes. Tap on to continue to the next step.
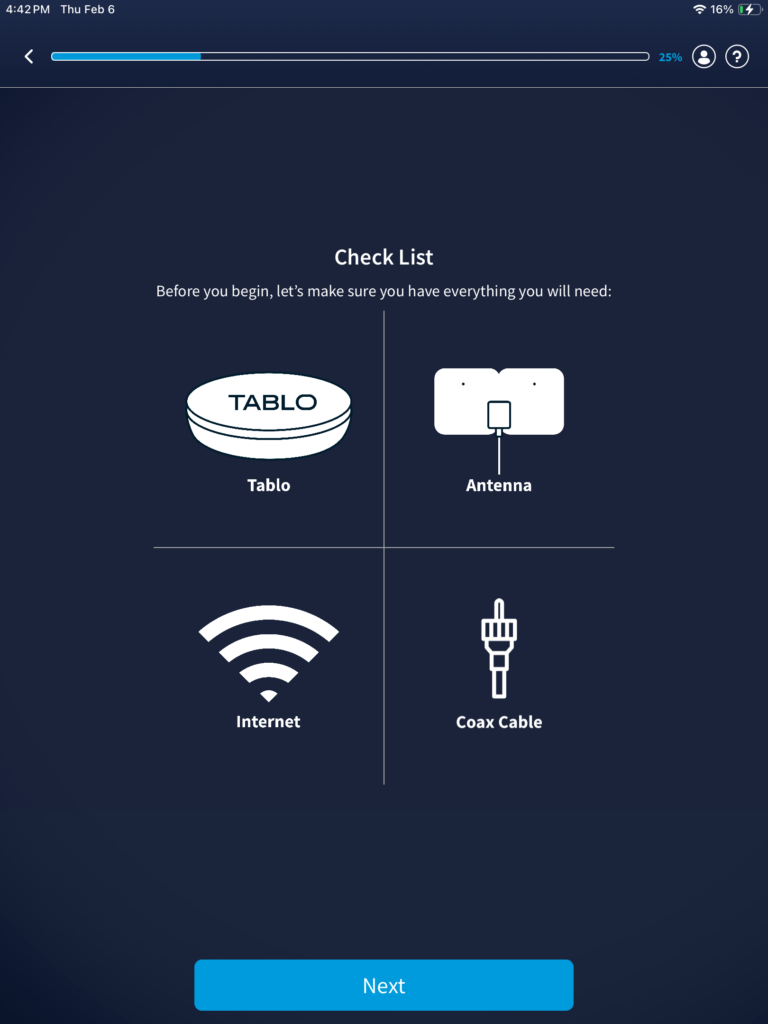
Now we see a checklist of the required items in order for your installation to be successful, you need the Tablo, antenna, Internet, and coax cable.
Surprisingly, they don’t tell you you need the power cord, connect the power cord to the Tablo that has been supplied, connect the antenna to the Tablo, (if you’re antenna has a coax cable connection then you do not need a coax cable), connect the ethernet cable to the Tablo and the end of the ethernet cable to your router. (Ethan at cable has been supplied, you can use any ethernet cable if the one that is supplied is not long enough.)
Tap on next to continue with the next step
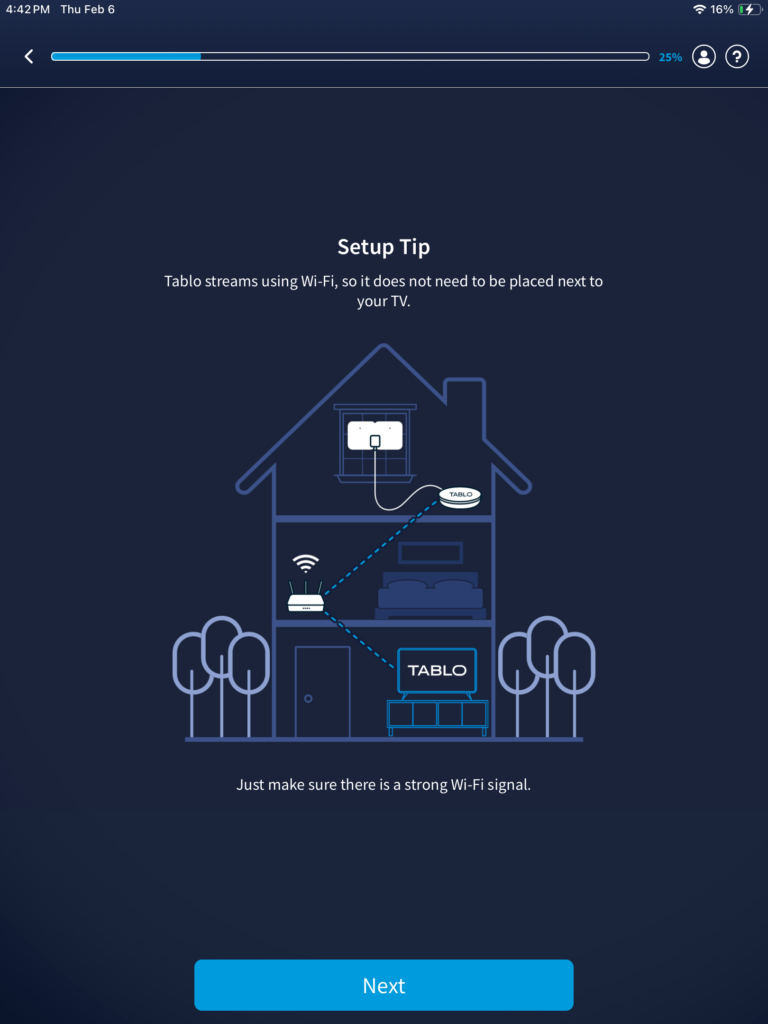
This screen will show you a configuration. Basically, your router should be in the middle so that way it reaches everywhere.
if you have not connected your antenna to the Tablo, please connect your antenna to the Tablo now. Tap next to continue with the next step.
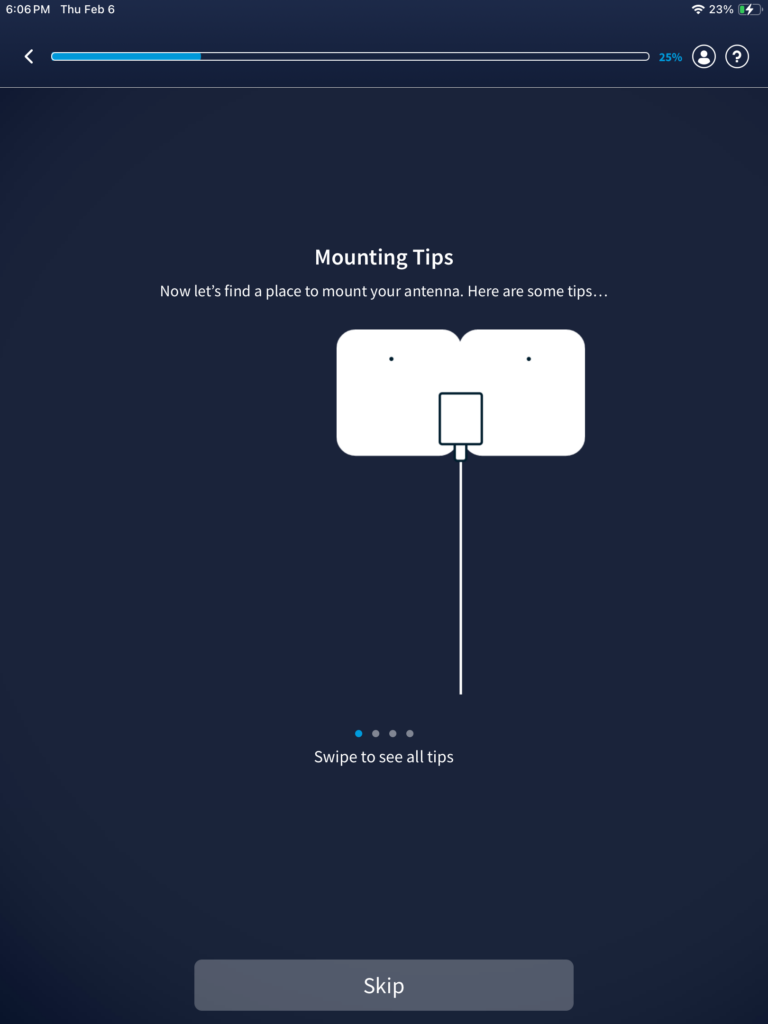
This screen will show tips on mounting your antenna. This is more specifically pertaining to the antenna that would have came with the Tablo if you purchased the tablet and the antenna. if you are using your own antenna, you basically can skip this in its entirely.to skip this innocent entirely just tap on skip.
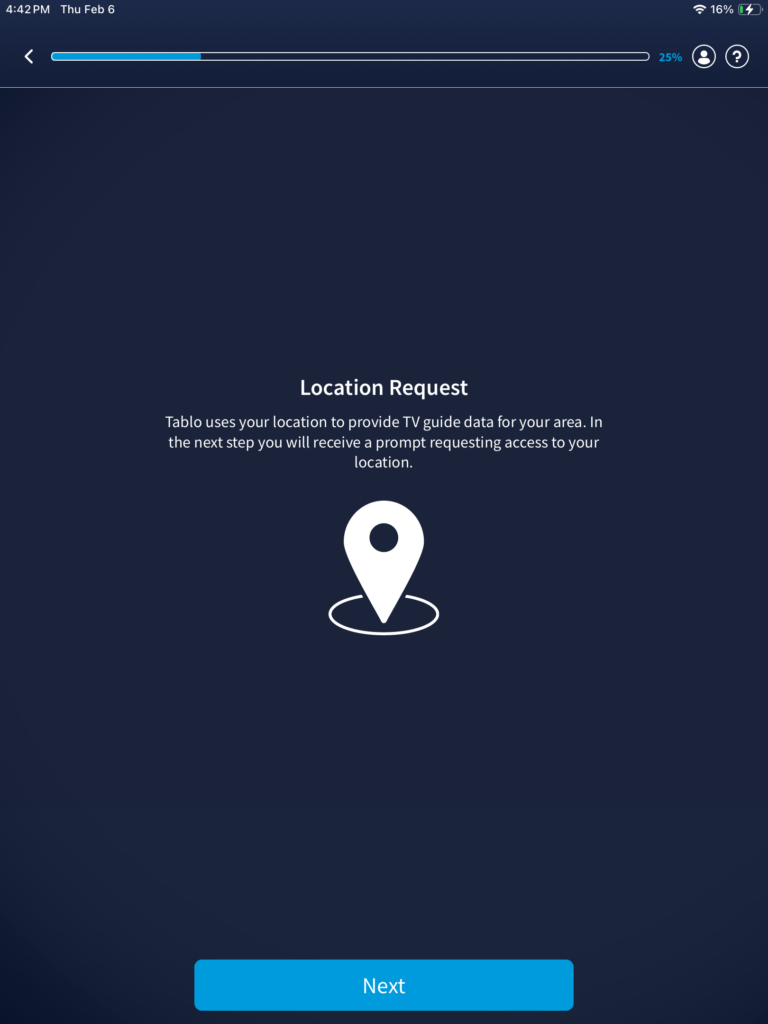
In order to retrieve electronic program guide (EPG) information so it accurately displays what your antenna is picking up from over the air, Tablo will need to your ZIP Code as this is how they can get the correct EPG information. Tap next continue to the next step.
After you tap on next from the previous step there may be a slight delay where your screen will be blank with a spinning circle, just wait a few moments and you’ll be able to continue with the steps.
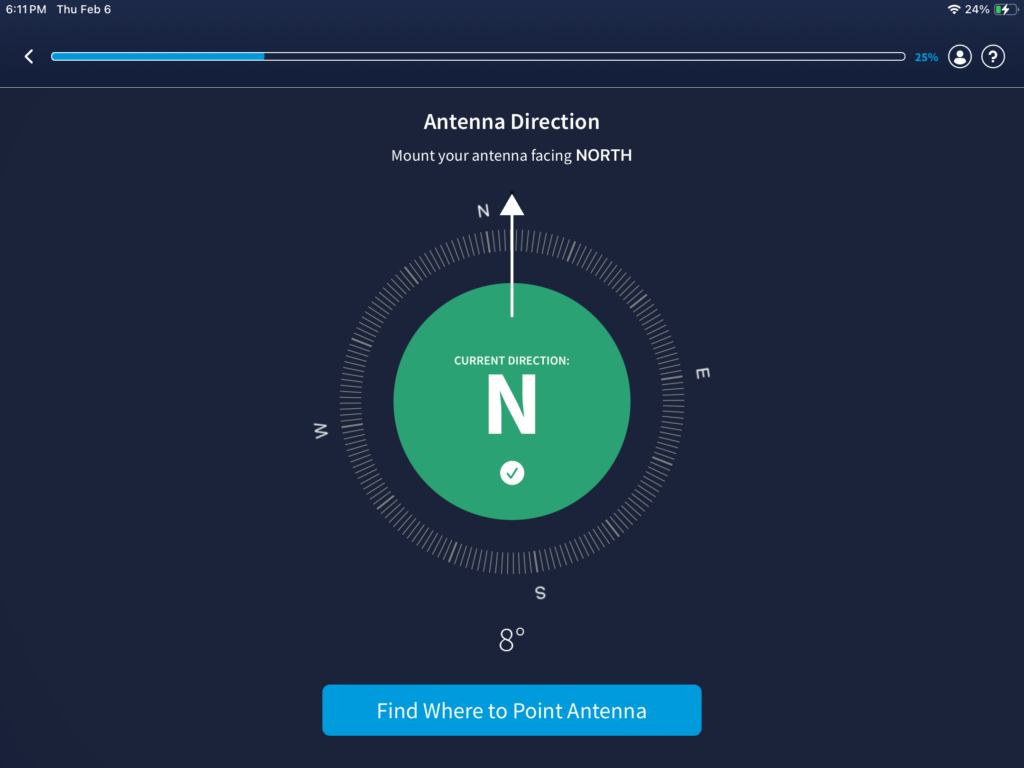
Now we see a compass in which they are telling you to mount your antenna facing north.When you rotate your electron device and to text, you are heading north in the center it will turn green as seen below, and if you aren’t facing north it will look like this. (See photo below this one).
You should mount your antenna however, which way you receive the most channels.

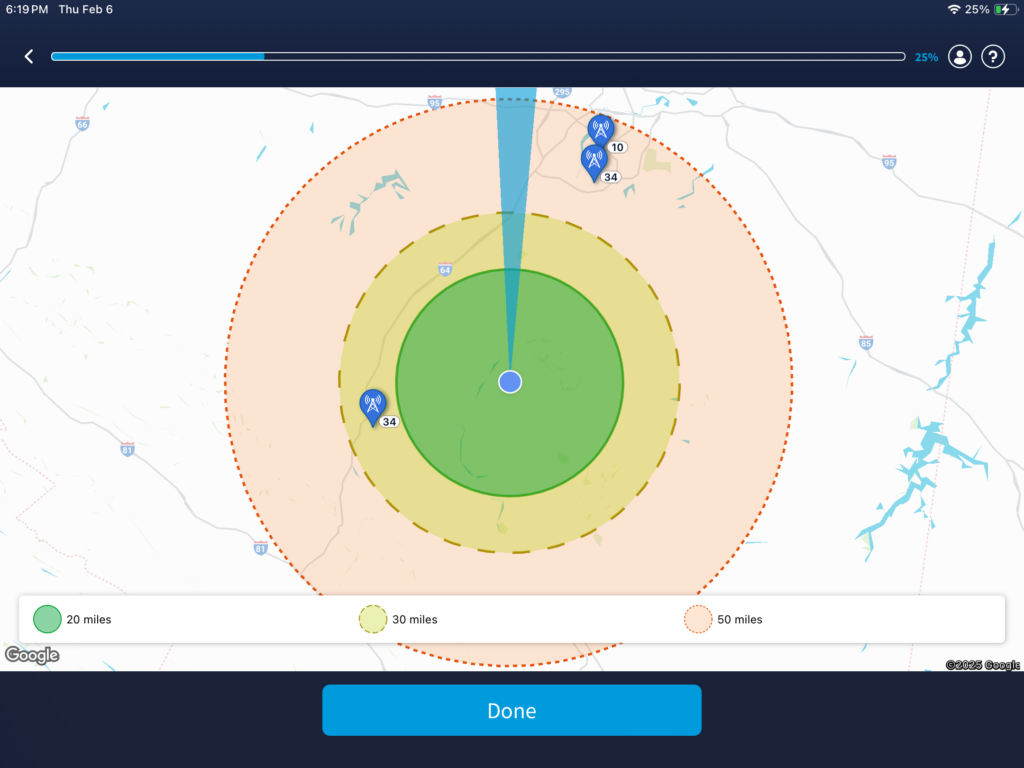
if you tap on “find where to point antenna“ the next screen will display a map, this map will show tulips with antennas in them. For me this clearly does not accurately represent where all of the TV stations are, there are quite a few TV stations and some of them don’t show here. I just tapped on done.
Now be on tennis set up is complete
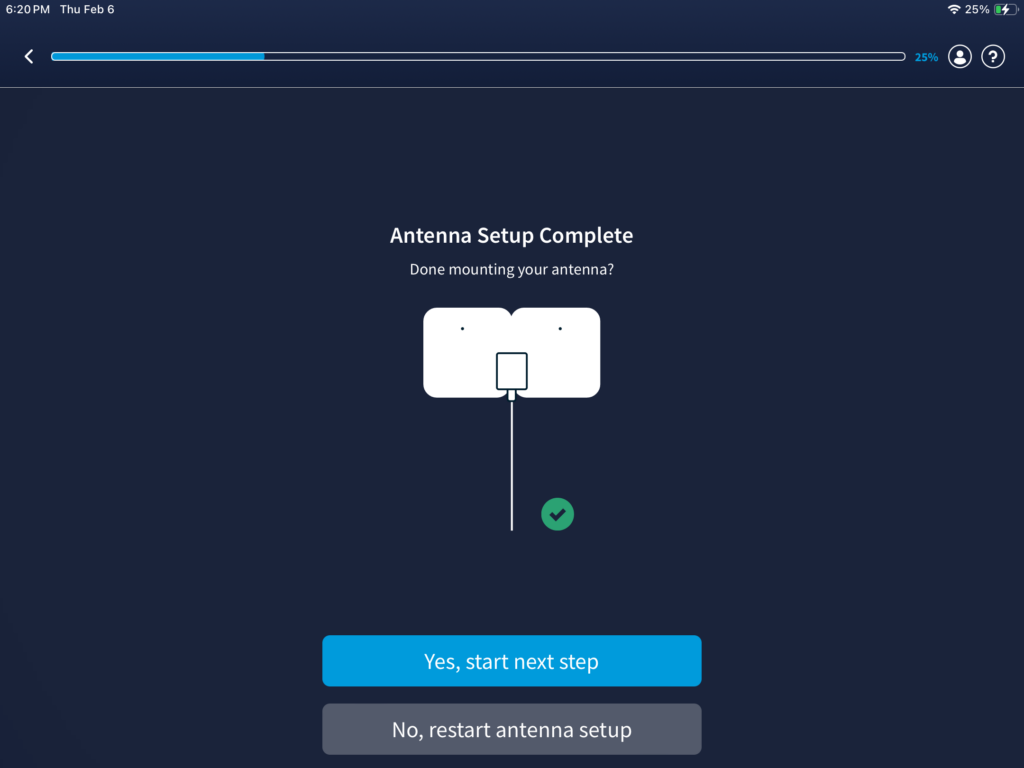
Now a screen shows from the checklist that we saw previously now has a darker shade of blue with a checkmark
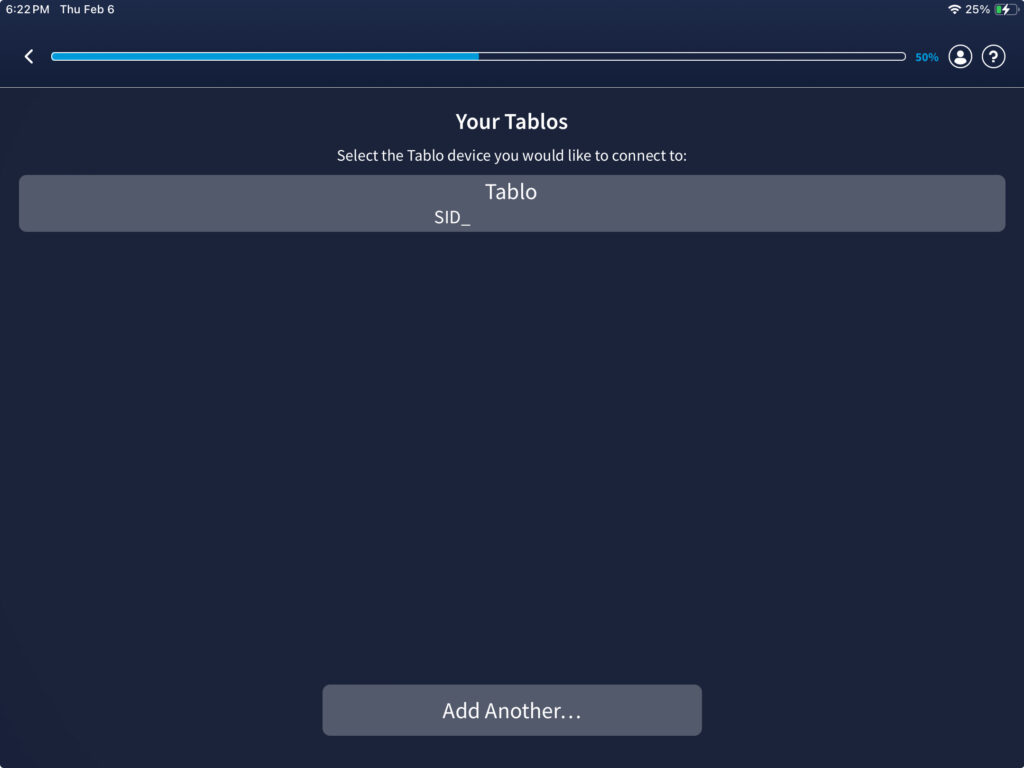
After you have tapped on next, there may be a slight delay and the next screen will ask you which Tablo you would like to connect to. Tap on the Tablo that you see to continue with the next.
There may be again a slight delay so you may see this screen.
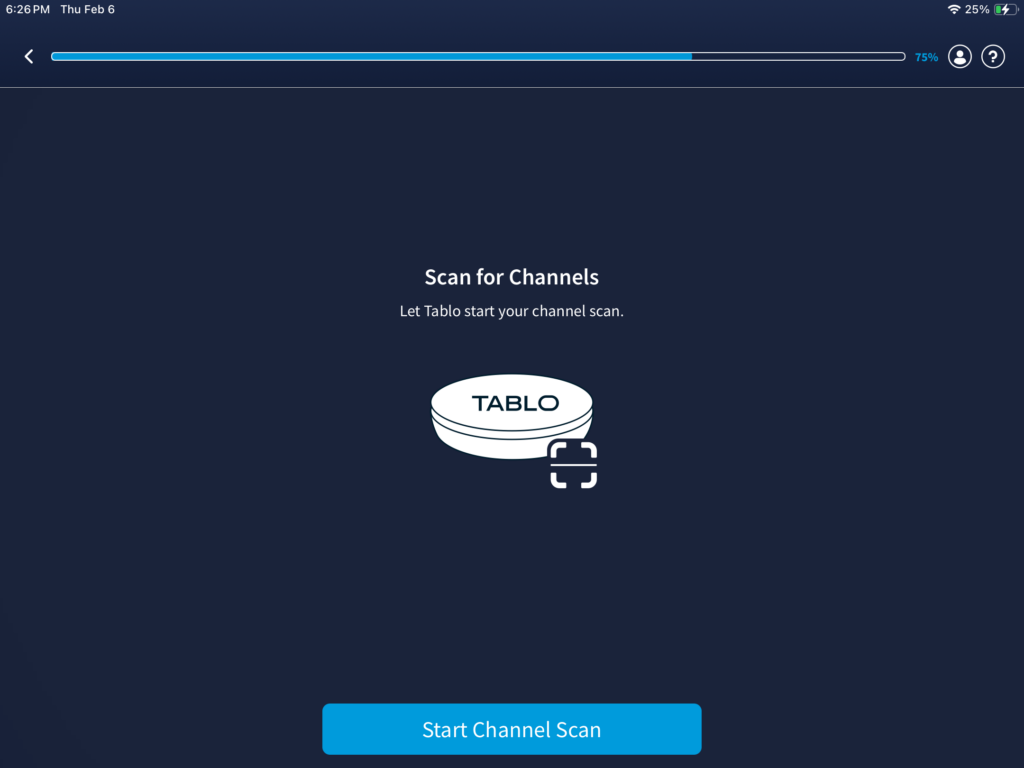
That was time to find all the free channels that are available from over the air and you will also receive some IPTV channels as well. (Internet protocol television). to begin the channel scan tap on start channel scan and then continue to the next step.
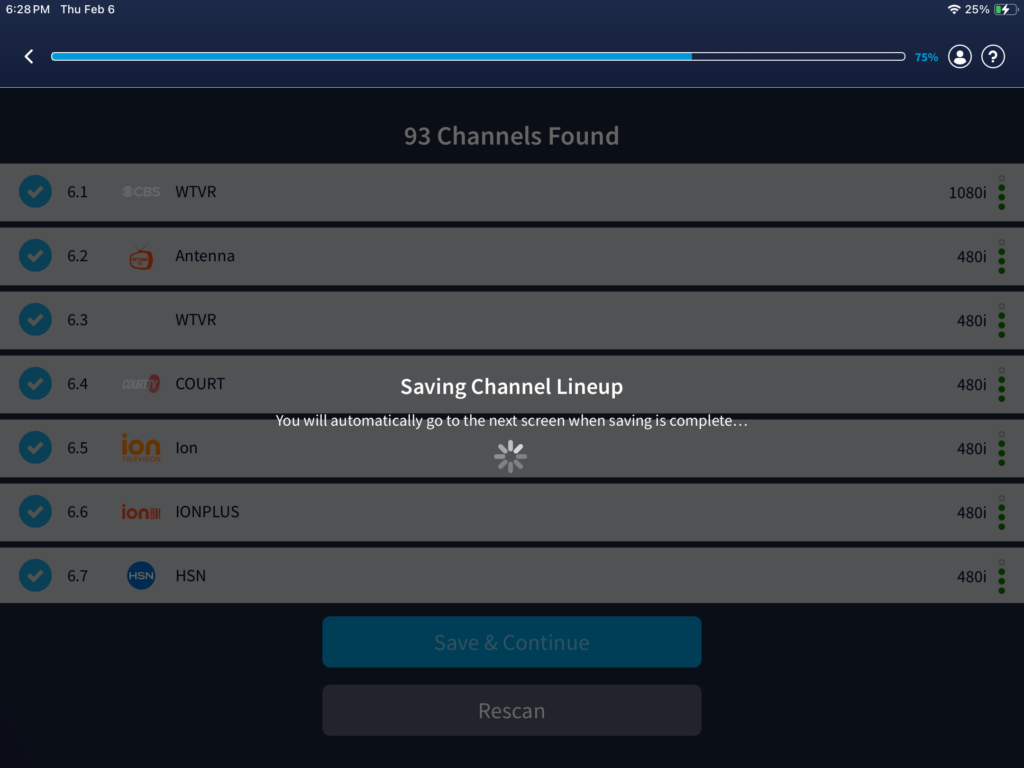
Now we are doing a channel scan where you should start to see over the air TV stations. Continue the next step.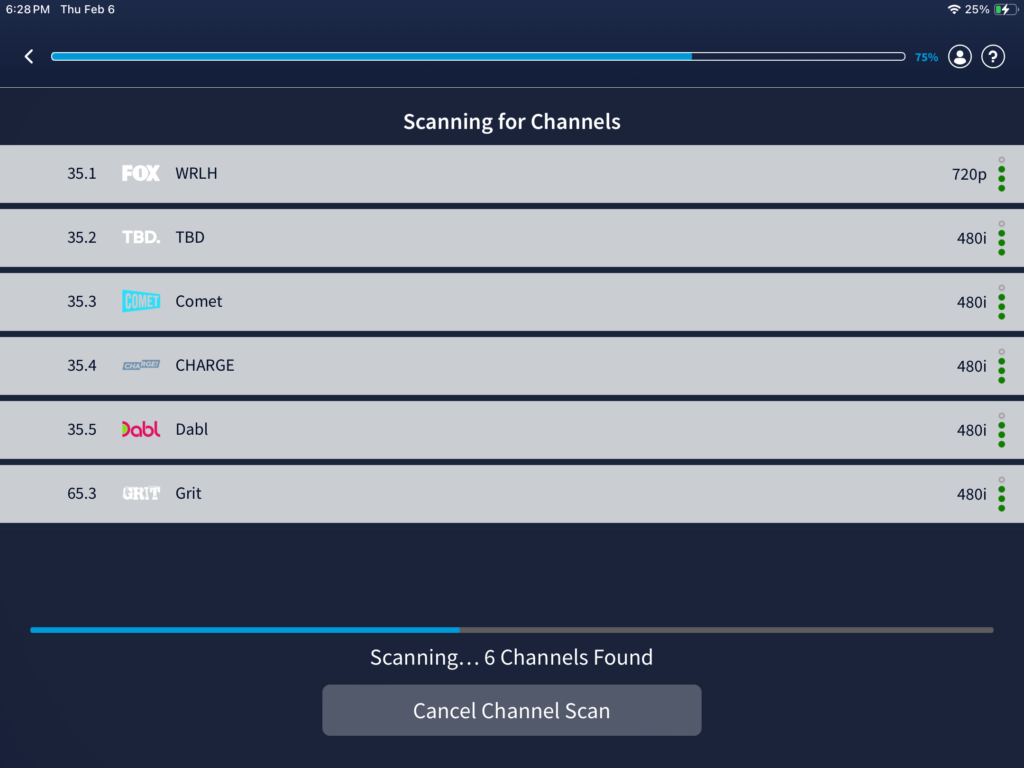 Once the channel scan has been completed, please tap on “save and continue” and you will notice that the screen is slightly grayed out with an overlay and it will say it is saving the channel lineup, you will automatically go to the next screen when this is complete. Go to the next step.
Now you’ll need to wait. The screen will automatically change. go to the next step
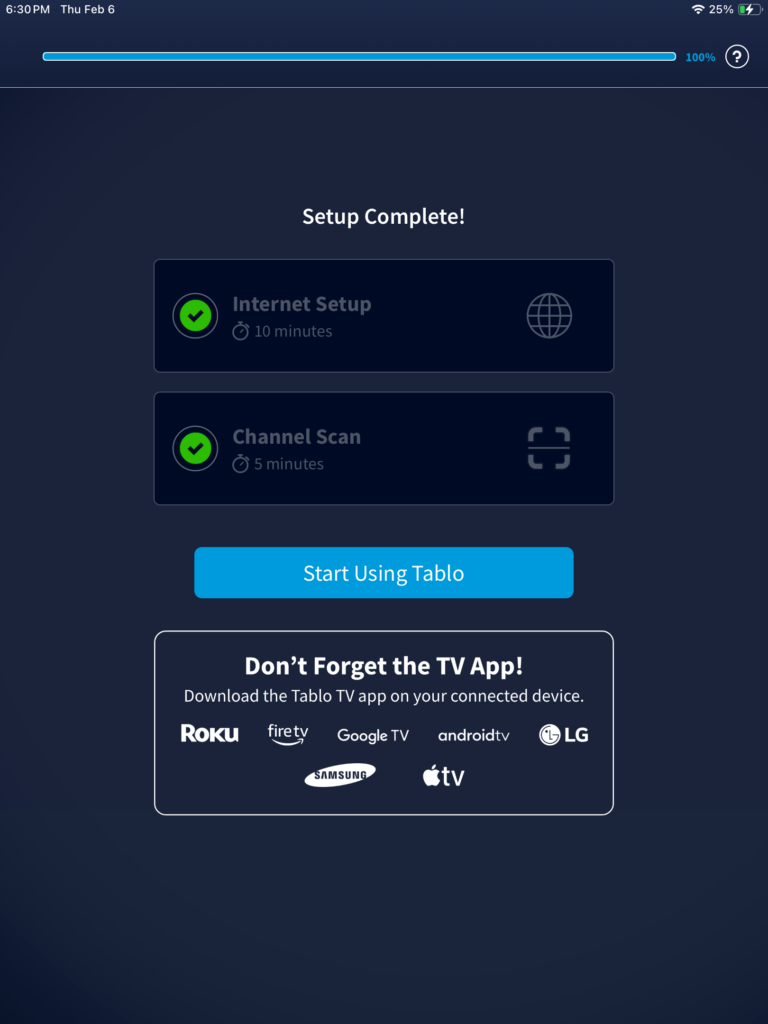
This is letting you know that the set up is complete now. Internet and channel scan has been completed. tap on “start using Tablo”. Now go to the next step.
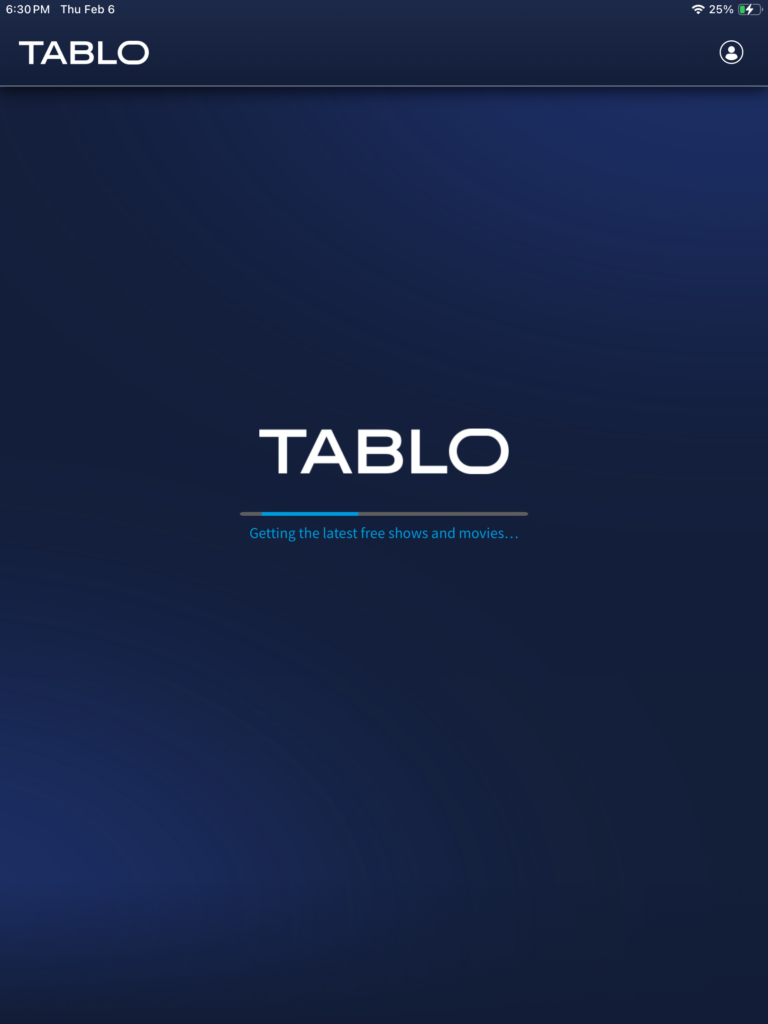
After you tapped on start using Tablo, it may take a few seconds for Tablo to be ready for you.
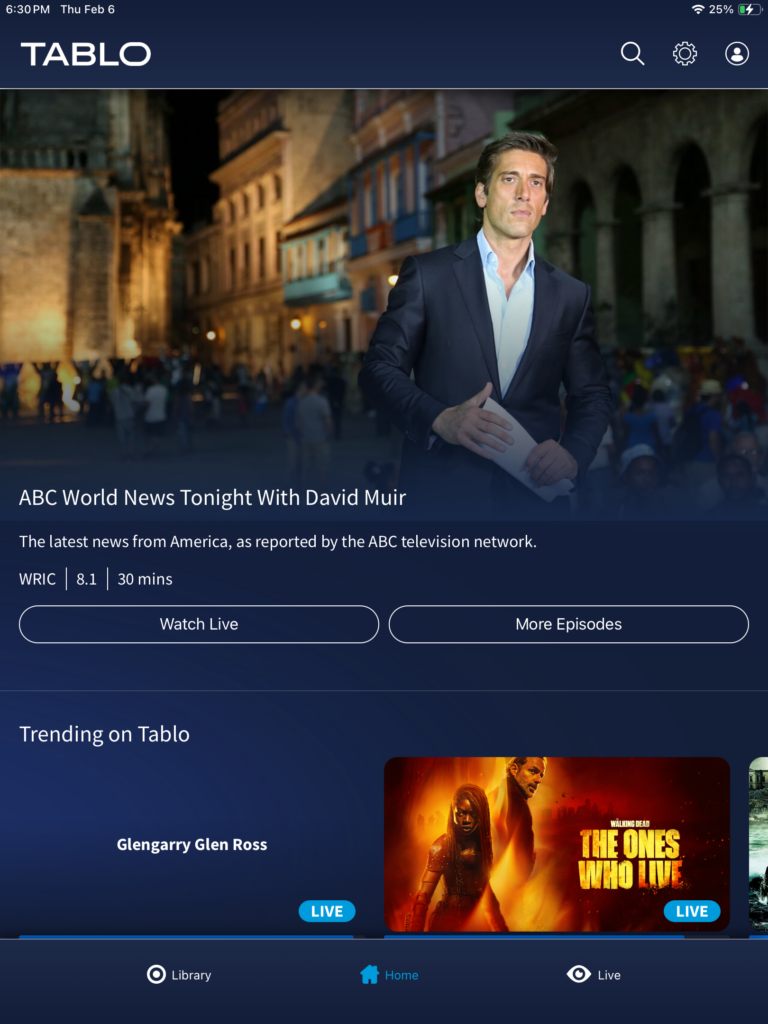
CONGRATULATIONS! You now have successfully set up your Tablo and it’s now ready to be put to use. In the screenshot below, you will see a large splash screen about a TV show or movie. In this case it is ABC world news tonight with David Muir.
.